Building a large bird cage at home is completely doable, and it's often the best way to get exactly the size and layout your bird actually needs. Most store-bought cages marketed as 'large' fall short of real minimums for bigger parrots, and the ones that do measure up cost a small fortune. If you're ready to build, here's everything you need to go from raw materials to a finished, safe cage your bird can move into.
How to Make a Large Bird Cage at Home: DIY Steps

Maya Bennett
22 Mar 2026
Choosing cage size and bar spacing for large birds
The first decision you need to lock in before buying a single screw is the interior dimensions and bar spacing. Get these wrong and nothing else matters. The general rule is that your bird should be able to fully spread both wings in every direction without touching the walls, perches, or any other surface. That sounds obvious, but most people still underestimate how much space a macaw or large cockatoo actually needs when they open up.
Here are the minimum cage sizes and bar spacings recommended by veterinary and avian welfare sources. Treat these as your floor, not your target. Bigger is always better when you're building from scratch.
| Bird Species | Minimum Cage Size (W x D x H) | Bar Spacing |
|---|---|---|
| Macaw / Large Cockatoo | 48 x 36 x 66 in | 1 to 1.5 in |
| African Grey / Amazon | 36 x 24 x 48 in (min) up to 36 x 48 x 60 in | 0.75 to 1 in |
| Medium Conure / Caique | 36 x 24 x 48 in | 0.75 in |
| Cockatiel / Lovebird / Small Conure | 24 x 24 x 36 in | 5/8 to 3/4 in |
Bar spacing is a safety issue, not just a comfort one. Spacing that's too wide lets a bird push its head through and get trapped, which can cause serious injury or death. The Association of Avian Welfare recommends spacing no greater than 1/2 inch for smaller birds, while macaws and large cockatoos do fine with up to 1.5 inch spacing because their heads and beaks are proportionally much larger. Always match spacing to the specific bird you own, not just a general category.
One more thing on dimensions: build taller than you think you need. Birds spend most of their time in the upper third of a cage, so extra height gives them more usable living space. If you're building for a macaw, I'd push that height to at least 72 inches if your ceiling and space allow.
Materials and tools checklist for a DIY large bird cage
Material choice is where most DIY cage builds go wrong. You need materials that are non-toxic, rust-resistant, and strong enough to withstand a large parrot's beak. A macaw can generate over 700 psi of bite force, so anything flimsy is not an option.
Frame materials
Your two best options for the frame are welded steel square tubing (powder-coated or stainless) and PVC-coated steel. Aluminum is lighter and rust-proof but tends to bend under heavy use from large birds. Avoid galvanized metal coated with zinc unless you can confirm it's been properly passivated, because zinc toxicity is a real risk for parrots. Powder-coated steel is the most common DIY choice because it's affordable, widely available at metal suppliers, and durable when the coating is intact.
Wire mesh
Use welded wire mesh, not woven or chain-link. Welded wire holds its shape, doesn't unravel if cut, and won't have the sharp snag points that woven wire can develop. For macaws and large cockatoos, go with 12-gauge or 14-gauge welded wire. For African greys and medium birds, 14-gauge to 16-gauge works well. Anything thinner than 16-gauge will get bent or chewed through by a determined large parrot. Stainless steel mesh is the gold standard for safety, but it costs significantly more. Powder-coated or epoxy-coated welded wire is a solid middle-ground option.
Full materials list
- Steel square tubing (1 inch x 1 inch minimum for large bird cages): enough for your full frame perimeter plus internal supports
- Welded wire mesh in your chosen gauge and correct bar spacing (order 10 to 15% extra to account for cuts)
- Stainless steel J-clips or hog rings and the corresponding pliers
- Stainless steel bolts, nuts, and washers (avoid zinc-plated if possible)
- Heavy-duty hinges rated for exterior use (stainless or brass)
- Stainless steel or solid brass cage latches with a secondary lock (carabiner clips work well)
- Powder-coat paint or metal primer and bird-safe paint for any bare cut edges
- Pull-out tray material: galvanized steel or ABS plastic sheet cut to fit
- Perch dowels or natural wood branches (untreated hardwood like manzanita, java wood, or drilled PVC as a backup)
Tools you'll need
- Angle grinder with a metal cutting disc (or a reciprocating saw with a metal blade)
- Drill and metal drill bits
- Wire cutters and J-clip pliers (or hog ring pliers)
- Measuring tape and a carpenter's square
- Clamps (at least 4 to 6 bar clamps or C-clamps)
- MIG welder if you're joining frame corners (optional but makes a stronger joint; bolting works fine too)
- Safety gear: gloves, eye protection, and a dust mask for cutting
Planning the layout: frame design, doors, and cleaning access
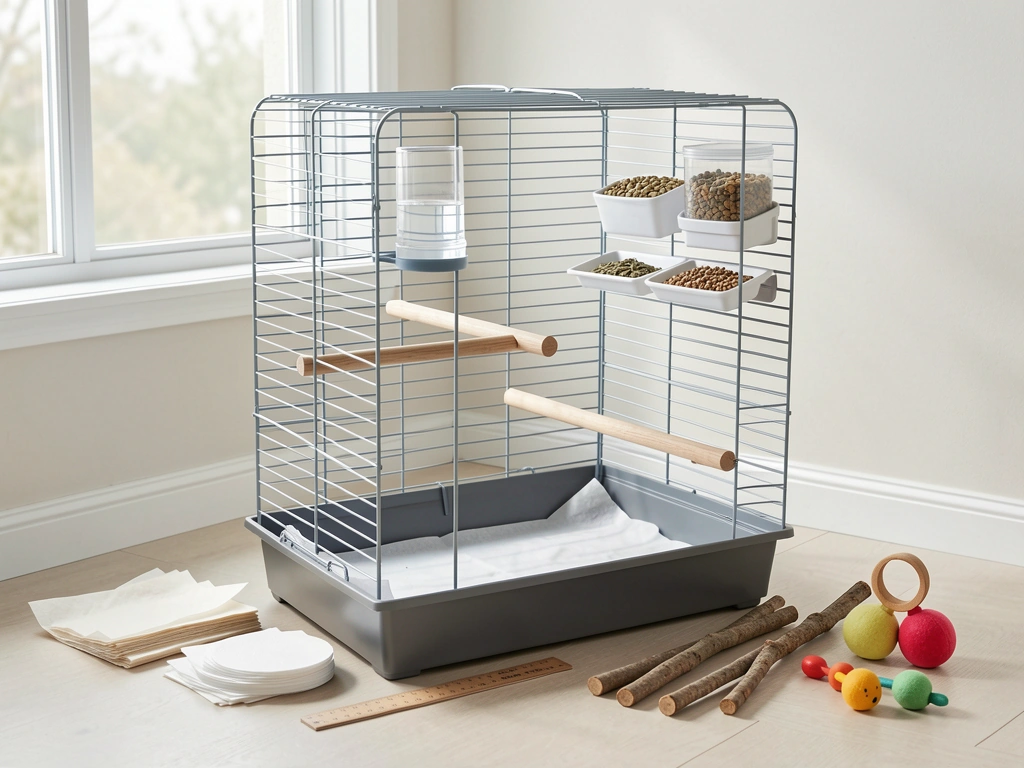
Before you cut anything, sketch your cage on paper or use a free tool like SketchUp. Nail down your outer dimensions, then plan where every door, shelf, and tray is going. For a large bird cage, you'll need at minimum one large front-access door (at least 12 x 12 inches for African greys, at least 16 x 16 inches for macaws) and ideally a second smaller side door for feeding without fully opening the cage. A full-length access panel on one side is worth the extra effort if you're housing a macaw or large cockatoo because it makes cage cleaning much faster.
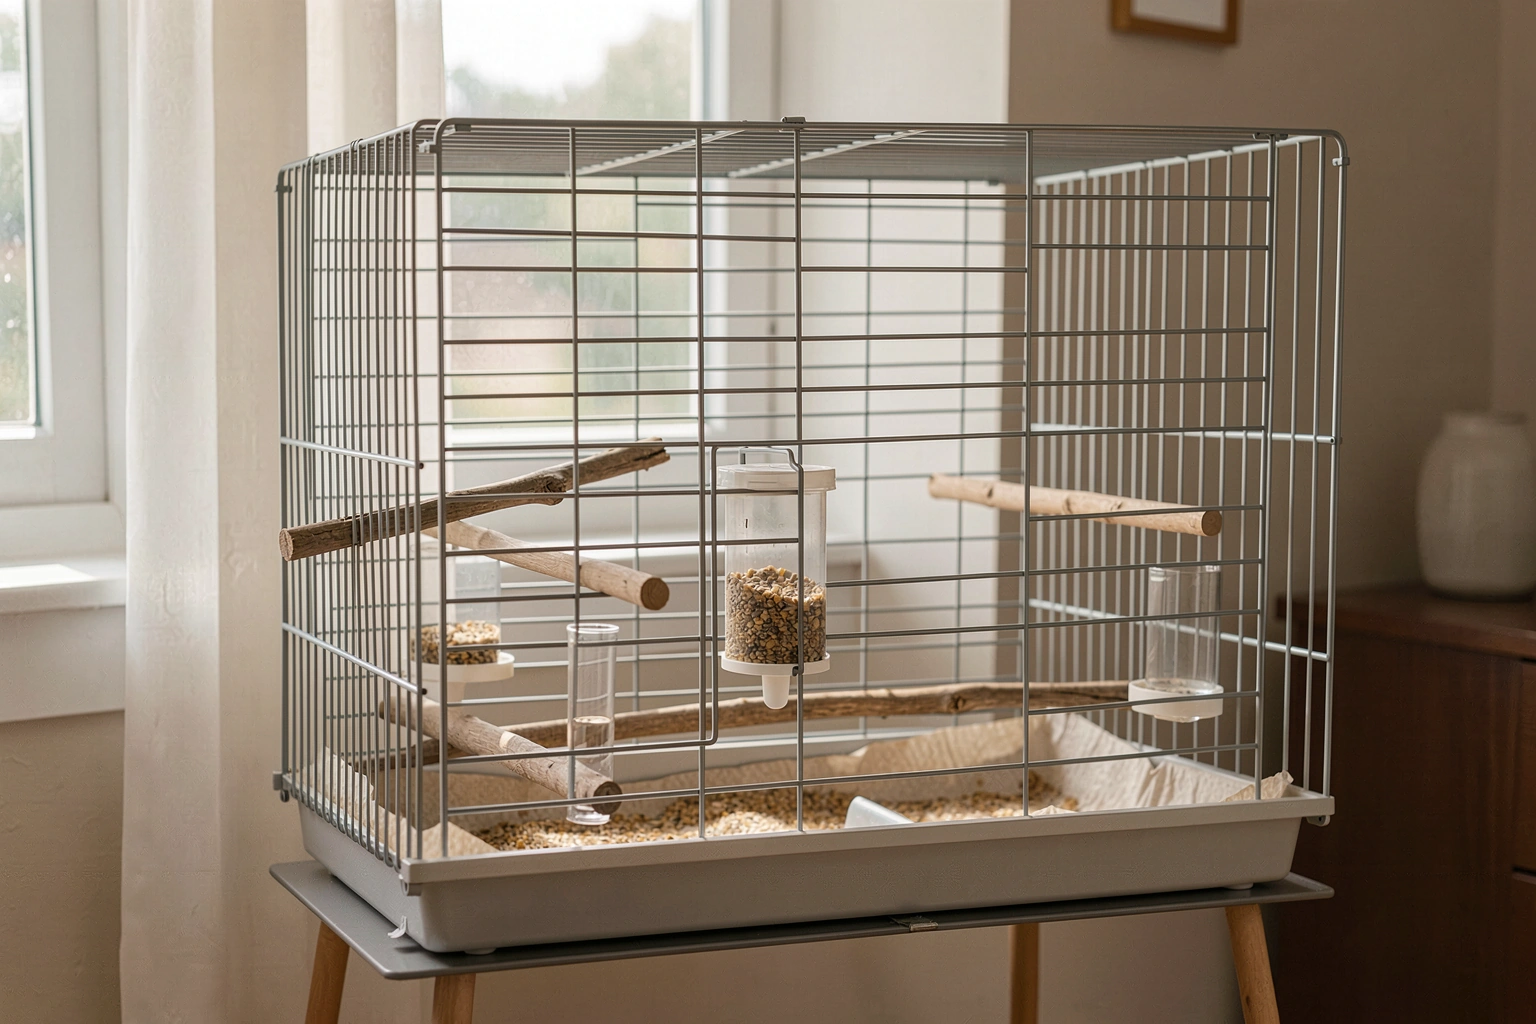
Plan your pull-out tray from day one. This is the flat tray at the bottom that catches droppings and debris. It should slide out smoothly without you having to reach inside. A tray that fits snugly with about 1/8 inch of clearance on each side is the target. If your tray is too loose it slides out accidentally; too tight and it binds with debris. Use a grate above the tray (wire mesh on a separate frame) so the bird can't sit directly in its droppings.
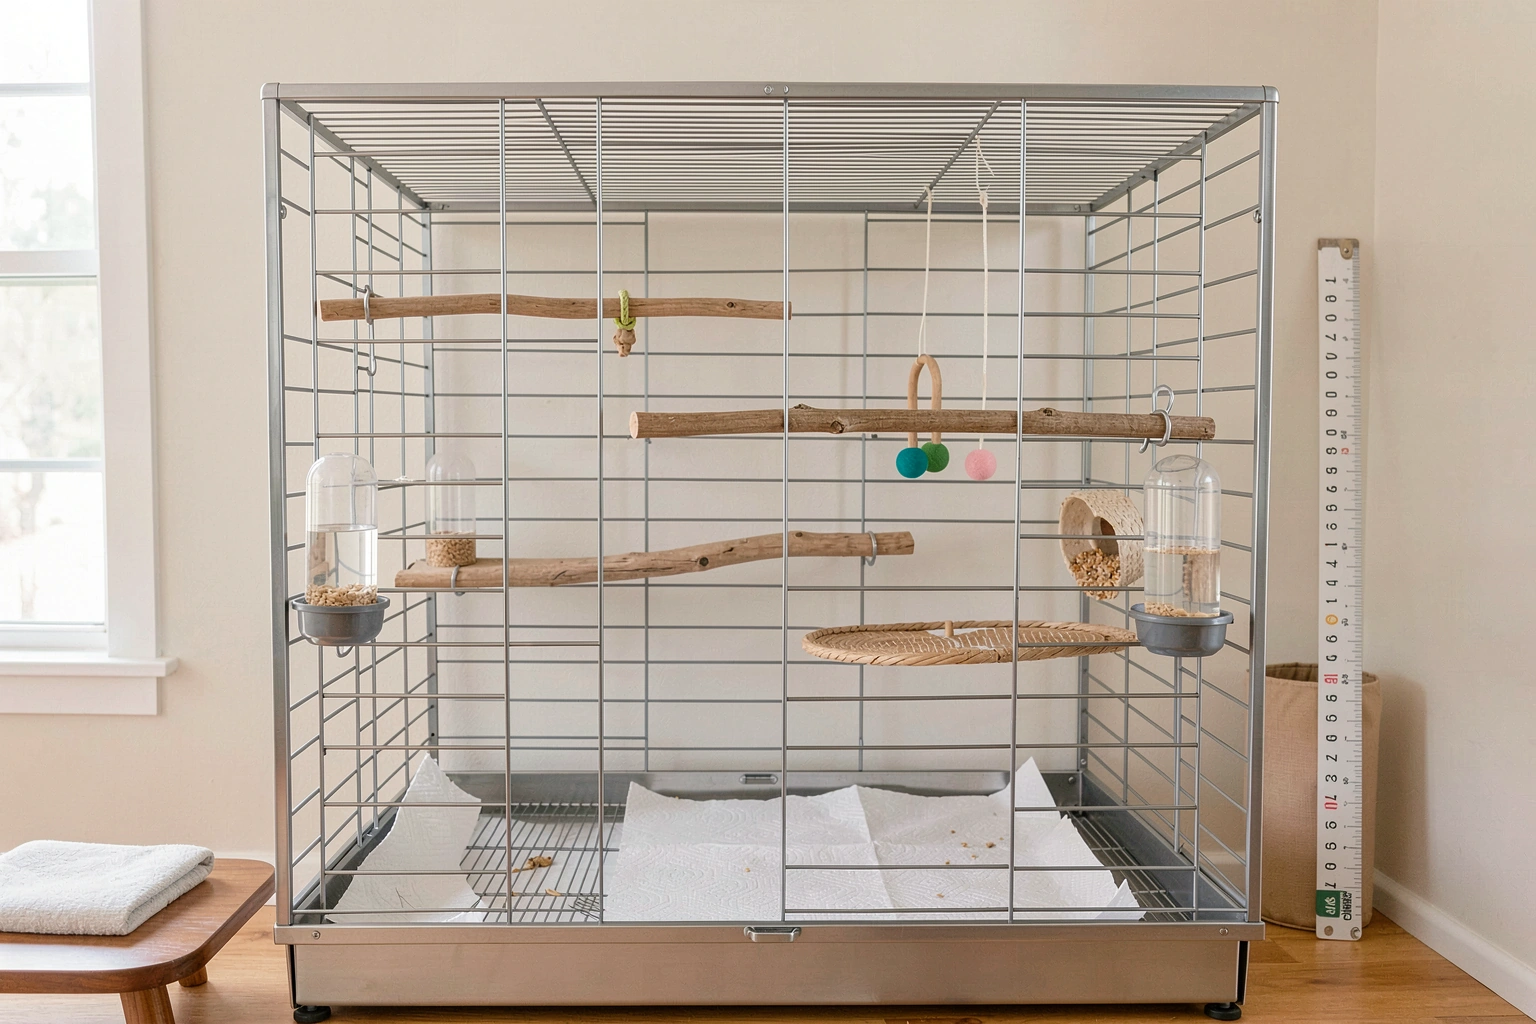
Think about perch placement during the design phase too. You want at least two or three perches at different heights, spaced so the bird can move between them without struggling. Perches should not be directly above food and water dishes, and they should not be so close to the cage walls that the bird's tail drags on the wire. Leave at least 4 to 5 inches between any perch end and the nearest wall.
If you're planning to build something more creative like converting a cabinet or armoire into a bird cage, the same principles apply: you'd still need proper bar spacing, ventilation, and cleaning access built into the design. But for a straight DIY build, a rectangular frame is the easiest place to start.
Step-by-step build process: assemble the frame and attach the wire
Now for the actual build. Work in order and don't skip steps. Trying to fix a crooked frame after the wire is attached is a nightmare.
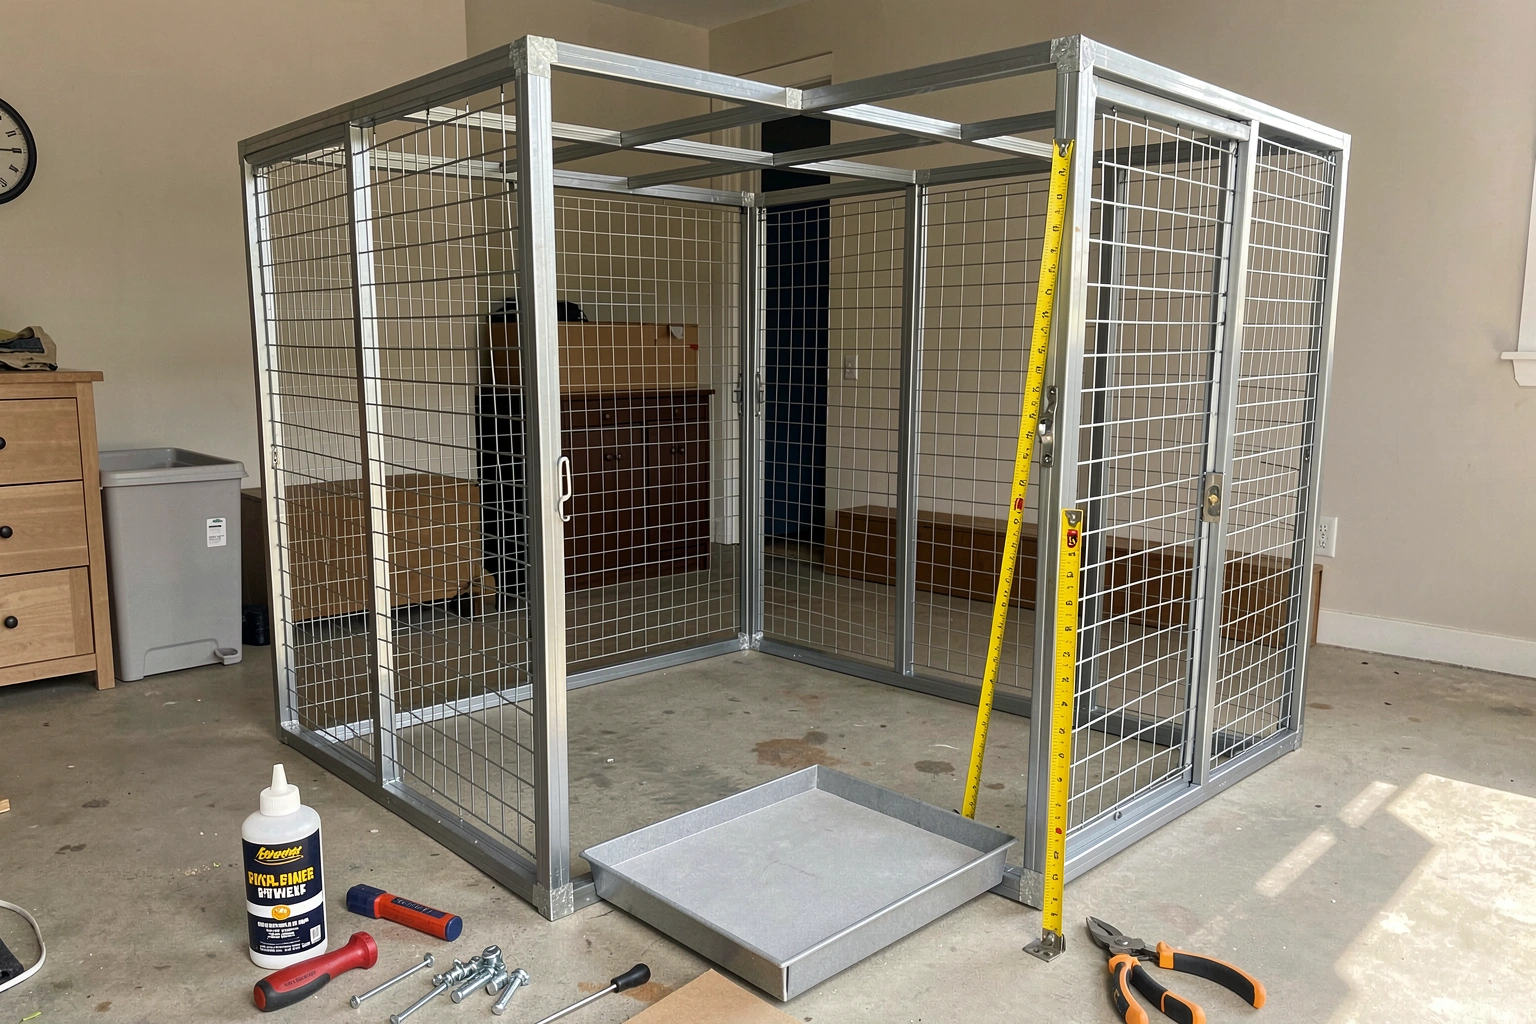
- Cut your steel tubing to length. Use your measured dimensions and cut all pieces for the base frame first. Label each piece with masking tape as you go. Double-check every measurement before cutting.
- Assemble the base rectangle. Lay the four base pieces on a flat surface, square them using a carpenter's square, and clamp them in place. Drill pilot holes and bolt the corners together (or tack weld if you have a welder). Confirm the diagonal measurements are equal before tightening fully — this is how you confirm the frame is truly square.
- Build and attach the vertical uprights. Cut four corner uprights to your desired height. Bolt or weld them to the base corners. Add a top frame rectangle the same way you did the base. Check plumb on all four uprights with a level.
- Add intermediate horizontal rails. For a cage taller than 36 inches, add at least one horizontal rail mid-height on each side. This keeps the wire from bowing under the weight and gives you a solid attachment point for doors.
- Cut the wire mesh panels. Measure each panel opening and cut your welded wire 1 inch larger on each side so you have an overlap onto the frame for attachment. Use wire cutters and work slowly. The cut edges are sharp — keep your gloves on.
- Attach the wire to the frame. Lay the wire panel flat against the frame opening and use J-clips or hog rings every 2 to 3 inches along all edges. Pull the wire taut before you clip so it doesn't sag. For extra security, add clips every inch along the bottom edge where a large bird is most likely to pull.
- Bend and secure all cut wire edges. Every cut end of the wire should be bent flat against the frame or covered with a U-channel edge trim. Exposed wire ends are the number one cause of bird injury in DIY cages. Run your bare hand along every edge before the bird goes in.
- Frame and hang the door(s). Cut your door opening in the wire panel before it's attached, or plan the opening in the frame itself. Build a separate wire door frame sized to overlap the opening by 1/2 inch on all sides. Attach hinges to the vertical frame member, hang the door, and test that it swings freely and closes flush.
- Install the tray and grate. Slide the tray into the base of the cage and set the wire grate above it. Confirm both slide in and out without binding.
Common build problems and quick fixes
- Frame won't stay square: Add a diagonal cross-brace inside the base until the frame is bolted solid, then remove it.
- Wire mesh is sagging: You didn't pull it taut before clipping. Remove clips along one edge, re-tension, and re-clip.
- Door swings open on its own: Add a second hinge or reposition the existing hinges closer to the top and bottom of the door frame.
- Tray binds when sliding: Sand or file the tray edges lightly, or apply a thin bead of food-safe silicone along the tray rails as a glide.
Reinforcement, hardware, and safety details
A large parrot that wants out will test every weak point in your cage. Corners, door latches, and wire attachments are the top three failure points, and you need to address all of them before the bird goes in.
Corners and frame joints
If you bolted your frame rather than welding it, add corner gussets (small triangular steel plates bolted across each corner joint). This dramatically increases rigidity. For welded frames, inspect every weld and grind down any sharp spatter before attaching wire.
Door locks and latches
Large parrots, especially African greys and macaws, are capable of opening simple spring latches within days. Use a two-step locking mechanism on every door: a primary cage latch plus a secondary lock like a carabiner clip or padlock-style latch. The secondary lock should require two different motions to open, which is beyond what most parrots can manage. Never rely on a single latch alone.
Wire edge safety
Go around every inch of wire edge one more time after the cage is fully assembled. Use metal U-channel trim or carefully bend every cut end flat with pliers. Birds investigate everything with their beaks and feet, and a single exposed wire tip can cut a toe or puncture the crop lining. This step takes 20 minutes and can prevent a vet visit.
Stability and tipping prevention
If your cage is on a stand (either a purchased stand or one you've built), bolt the cage to the stand and bolt the stand to the wall or floor if the combined height exceeds 5 feet. A large bird rocking the cage can tip the whole setup. At minimum, add rubber feet or leveling pads to the base so the cage doesn't shift on hard floors.
Finishing and setup: cleaning, perch placement, and safety inspection
You're almost ready to hand this cage over to its new occupant. Before that happens, go through these final steps in order.
Clean and cure the cage
Wash the entire cage with hot water and unscented dish soap, rinse thoroughly, and let it dry completely in a well-ventilated area. If you used any paint or coating on cut edges, give it at least 48 to 72 hours to fully cure and off-gas before the bird enters. Even "bird-safe" paints need cure time. Wipe the cage down again after curing with a damp cloth to remove any dust or residue.
Install perches correctly
Mount at least two perches at different heights using bolts that pass through the cage wire and lock with a wing nut on the outside. The perch diameter should match your bird's foot size: a macaw needs a perch of at least 1.5 to 2 inches in diameter, while an African grey does well on 1 to 1.5 inch diameter perches. Natural wood branches with irregular diameters are better for foot health than uniform dowels. Make sure no perch is positioned so that droppings fall into food or water dishes below.
Final safety inspection checklist
Run through every item on this list before your bird enters the cage for the first time.
- Confirm bar spacing is correct for your specific bird species and that no opening is larger than the maximum safe spacing
- Run your bare hand along every cut wire edge and every interior corner — nothing should catch on skin
- Open and close every door and confirm both the primary latch and secondary lock engage fully
- Shake the cage firmly from the top: the frame should not flex, wobble, or shift on its base
- Slide the tray in and out fully — it should move smoothly and not jam
- Check that the grate above the tray is secure and cannot be pushed up by the bird from below
- Confirm all bolts and fasteners are fully tightened and that no bolt ends protrude into the bird's living space
- Verify perches are solid and cannot rotate or pull out when weight is applied
- Confirm the cage is level and stable, and that the stand (if used) is secured
- Do a final visual scan for any debris, metal shavings, or wire clippings left inside the cage
Once you've checked every item, add food and water dishes, place a few toys at varying heights, and introduce your bird. Most large parrots need a day or two to get comfortable in a new space, so don't worry if they stick to one perch at first. Give them time and they'll start exploring.
Building this yourself means you know exactly what went into it and how to fix it if something ever needs adjustment. That's a real advantage over buying a finished cage and hoping the quality holds up. Take your time on the measurements and the wire edge work, and you'll end up with something that lasts for decades and keeps your bird genuinely safe.
FAQ
How do I confirm the interior dimensions are truly large enough for my specific bird?
For large parrots, plan the cage to fit their wingspan and movements, not just their body size. A practical way to sanity-check your design is to measure the bird’s full wing span while it flaps, then add clearance so the wing tips never come within a couple inches of any wall, perch, or door frame at the same time.
Is powder-coated or epoxy-coated welded wire safe for large parrots if the coating gets scratched?
Yes, but only if the coating is truly intact and you can verify safety. Powder-coated or epoxy-coated welded wire is usually fine as long as there are no exposed metal spots at joints, cut ends, or welds where corrosion could start. If the coating looks chipped or flaking, plan to trim and re-finish those spots before the bird uses the cage.
What should I do if I notice rust or flaking after assembling the cage?
If you see rust at any point, assume the area will worsen in bird-safe conditions over time. Remove the rusted section or replace the wire or frame part, then ensure cut edges and weld areas are sealed with a cure-complete, non-toxic coating. Never cover rust with tape or temporary patches where chewing can occur.
How much ventilation should a large DIY bird cage have, and where should I place it?
Ventilation is about airflow patterns and avoiding stagnant corners. Add open sides or use a design that prevents heat buildup near perches, and do not block major airflow with solid panels except where needed for doors and trays. If your room is dry and drafty, still ensure the cage is not placed in direct HVAC blasts or strong drafts.
What door style is safest for big parrots, and how can I test it before the bird is inside?
Choose based on what the bird can reach, not just what fits the cage. For large parrots, doors that open inward with a fixed frame and tight tolerances tend to be sturdier, but any door must use a two-stage latch plus trim to prevent wire gaps. Test the door with two hands, then tug harder at the latch side to see if it flexes.
Can I use a pull-out tray for a large parrot safely, and how do I prevent accidental tray removal?
Use it, but build it so it cannot slide out under normal bird contact. The tray should have guide rails and a consistent fit, aim for minimal clearance as you planned, and include a positive stop so accidental forward pulls do not drop the tray. Avoid leaving the bird with enough leverage to reach and extract it.
How do I prevent droppings from contaminating food and water on a cage with a bottom grate?
Don’t rely on a single grate or expect it to stop all mess. In practice, add a grate frame and keep the tray accessible for daily cleaning, then place food and water so droppings cannot land in them when the bird shifts positions. Also plan for a secondary cleaning step, spot-wiping around perch areas every day or two.
What’s the safest way to introduce my bird to the new large cage so it doesn’t get stressed or injured?
Yes, but the transition needs to be deliberate. Keep initial setup quiet and stable, then move slowly from familiar perch heights. If you are introducing a new cage indoors, cover part of the cage with a light cloth on one side during the first day so the bird can feel secure, but do not block airflow or fully darken the space.
Can I seal gaps or seams with silicone, and how do I make sure it’s safe once cured?
Any caulk, sealant, or adhesive must be specifically safe when cured, and you should avoid products labeled for construction use unless you can confirm they are non-toxic after curing. Prefer mechanical fasteners or fully sealed metal surfaces where possible, and if you use sealant, allow full cure time, then wipe and vent until there is no odor before the bird goes in.
What hardware choices reduce the risk of chewing or loosening in high-bite parrot cages?
Large parrots can chew cage materials and also chew on fasteners. For mounting hardware, use corrosion-resistant bolts and lock hardware placed where the bird cannot access the threaded end. If you use wing nuts or removable parts, position them outside and choose models that cannot be loosened with simple foot leverage.