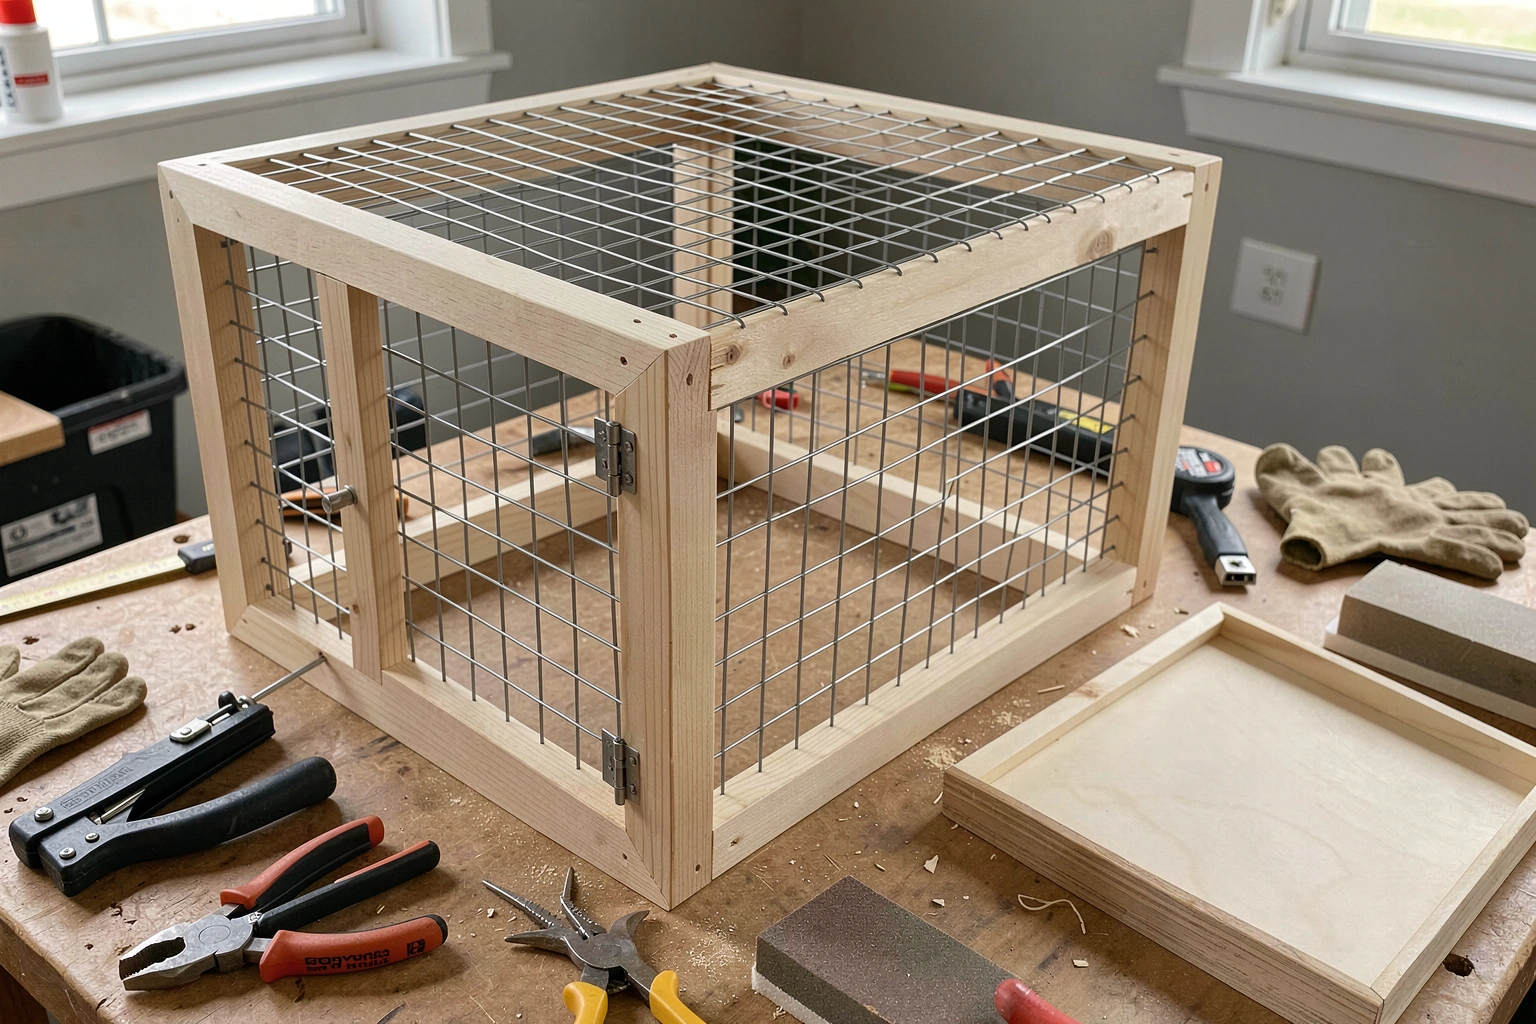
You can build a bird cage tray today with basic tools, the right material, and about an hour of work. Whether your original tray cracked, went missing, or you're building a completely custom cage from scratch, the process is the same: measure precisely, pick a bird-safe material, cut and finish it cleanly, and verify the fit before your bird gets near it. Here's exactly how to do that.
How to Make a Bird Cage Tray: DIY Step-by-Step Guide

Maya Bennett
22 Mar 2026

Choosing a cage tray type and material
The first decision is what kind of tray you're making. Most cage trays fall into one of two categories: a pull-out flat tray that slides on rails beneath the cage floor, or a fixed-bottom tray that sits permanently under the grate. Pull-out trays are far more practical for cleaning, so if you have any choice in the matter, go with that style.
For material, you have three realistic options as a DIYer: ABS plastic, stainless steel sheet, and sealed or coated wood. Each has real trade-offs.
| Material | Bird Safety | DIY Friendliness | Cost | Best For |
|---|---|---|---|---|
| ABS Plastic (3/16" thick) | High — no coatings, no rust | Very easy to cut and shape at home | Low | Most pull-out replacement trays |
| 304 Stainless Steel Sheet | Highest — zero paint, zero rust | Moderate — needs snips or an angle grinder | Medium–High | Long-term or heavy-use cages |
| Sealed Wood (exterior-grade plywood) | Acceptable if sealed properly | Easy to cut, but must be fully sealed | Low | Large custom cages, fixed bottoms only |
ABS plastic is the go-to for most DIY tray projects. Commercial pull-out trays are made from one-piece molded ABS at about 3/16 inch thick, and you can buy ABS sheet stock from most plastics suppliers or online for a few dollars per square foot. It cuts cleanly with a utility knife or jigsaw, bends with heat from a heat gun, and has no coatings that can chip or flake into your bird's environment. A standard tray depth of around 1.5 inches (38 mm) is the sweet spot: deep enough to contain droppings and litter without being so deep that it catches on the cage frame.
Stainless steel is the most durable and genuinely bird-safe option. Look for 202 or 304 grade stainless, which is what commercial bird cage manufacturers use precisely because it carries zero paint and won't rust. The downside is that working with sheet metal requires more tools and a bit more confidence. If you're comfortable with aviation snips and a file, it's absolutely doable.
Wood works for fixed-bottom trays on large custom cages, but only if every surface is sealed completely with a bird-safe, water-resistant coating (like a food-safe epoxy or water-based polyurethane). Bare or poorly sealed wood absorbs moisture and droppings, becomes a bacterial breeding ground, and is nearly impossible to sanitize over time. If you're building a larger custom setup, check out guides on how to make a large bird cage for more on structural material choices.
Measuring your bird cage and designing the tray dimensions
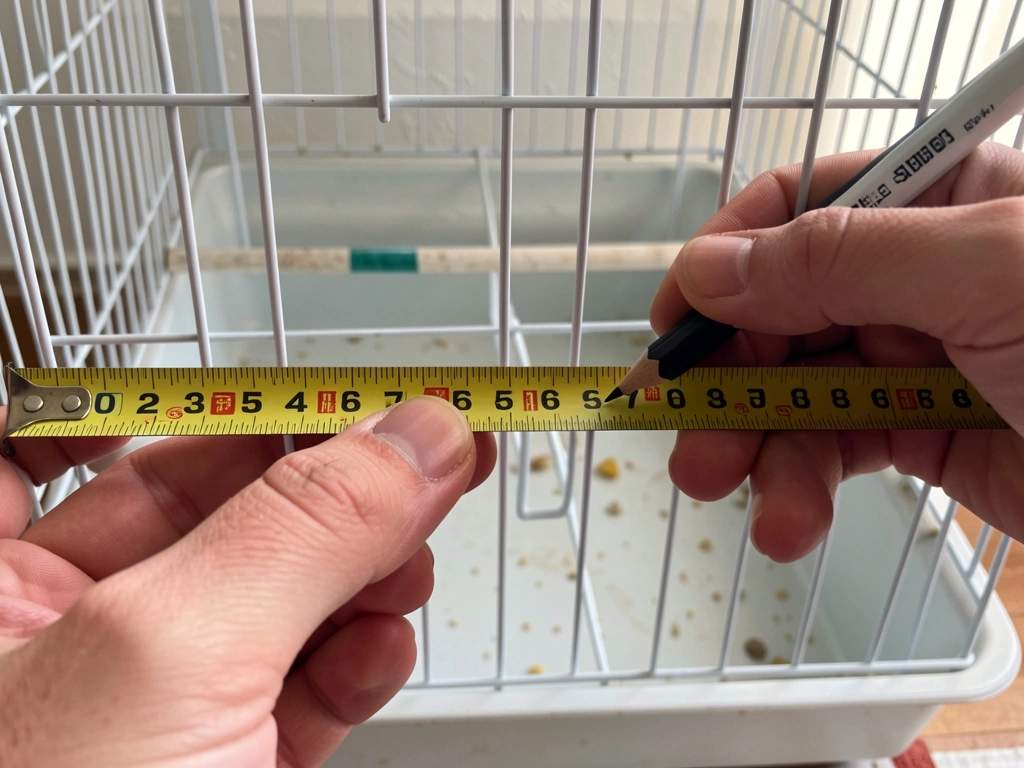
Good measurements are what separate a tray that works from one that wobbles, leaks at the edges, or won't slide in at all. Take your time here — measure twice and write everything down before you cut anything.
What to measure
- Inner width of the cage frame at the tray opening (measure at both the front and the back, since frames aren't always perfectly square)
- Inner depth of the cage frame at the tray opening (front to back)
- The height of the rails or lip the tray slides into, if any
- The gap between the cage floor grate and the bottom of the cage frame (this tells you the maximum tray depth you can use)
- The thickness of any existing rails or grooves the tray needs to slide through
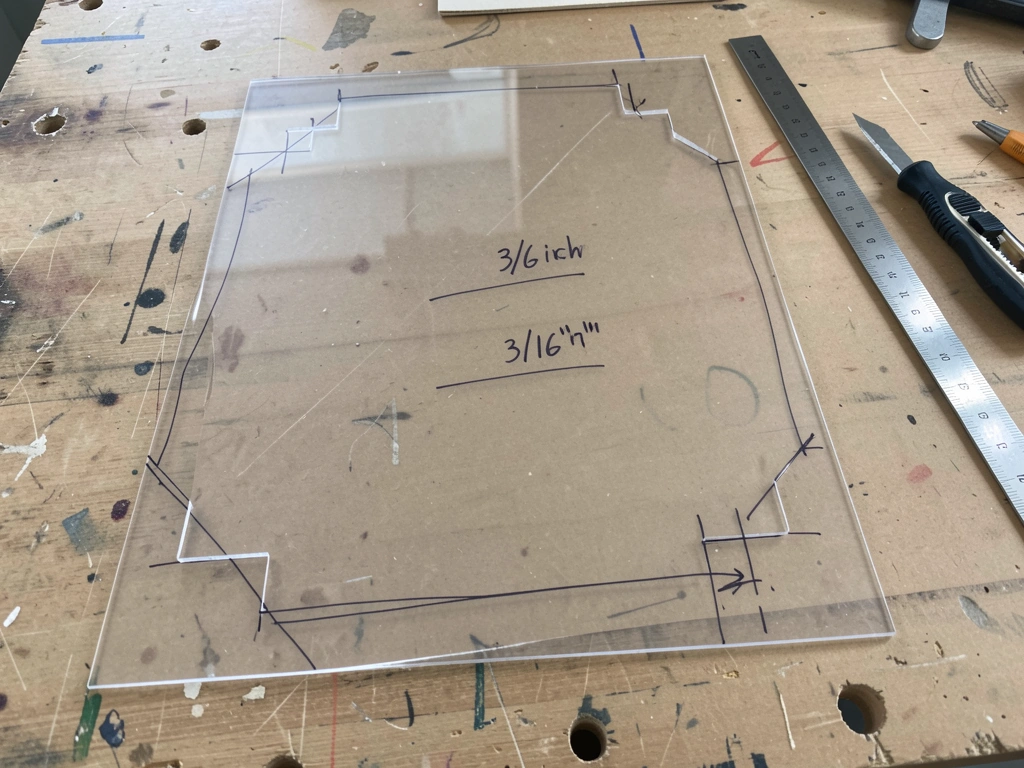
Once you have those numbers, subtract 1/8 inch (about 3 mm) from both the width and depth measurements. That's your tray's flat base size. This small gap is intentional: it gives the tray enough clearance to slide in and out without binding, while still fitting tightly enough that droppings don't fall through the sides. If you're making a lipped tray (which you should), the lip will compensate for that gap and keep litter contained.
Designing the lip and depth
A tray without raised sides is really just a flat sheet, and litter and droppings will slide right off it. Plan for a lip height of at least 1 inch, ideally 1.5 inches (38 mm). This is the depth dimension used in professionally made pull-out ABS trays and it works well for parakeets, cockatiels, conures, and similarly sized birds. For larger parrots that scatter food and droppings more aggressively, consider going up to 2 inches. Your lip height also can't exceed the gap between the cage grate and the bottom rail, so check that measurement first.
Sketch the tray on paper or in a free tool like Google Drawings before you cut. Label the base dimensions, lip height on all four sides, and note which side is the front (the pull-out handle side). A simple rectangle with four upturned edges is all you need.
Tools and materials for making a bird cage tray
You don't need a full workshop for this project. Here's what you'll realistically use, split by material choice.
For an ABS plastic tray
- ABS plastic sheet, 3/16 inch thick (order slightly larger than your tray dimensions to give yourself room to cut)
- Utility knife and metal straightedge, or a jigsaw with a fine-tooth blade
- Heat gun (a cheap one works fine) or a strip heater for bending the lips
- Measuring tape and a permanent marker
- Fine-grit sandpaper (220 grit) for smoothing cut edges
- Clamps or a bending jig (two pieces of scrap wood and a clamp work perfectly)
- ABS cement or plastic-compatible adhesive if you're building a multi-piece tray instead of bending a single sheet
For a stainless steel tray
- 304 stainless steel sheet, 20–22 gauge (thinner gauges are easier to bend by hand)
- Aviation snips (left, right, and straight cut set)
- Bench vise or a metal brake for clean bends
- Metal file and 220-grit wet/dry sandpaper for deburring all cut edges
- Rivet gun or stainless steel spot welder if assembling corner pieces
- Measuring tape and a scribe or silver marker
General supplies for either approach
- Safety glasses and gloves (ABS dust and metal burrs are both irritants)
- A flat work surface
- Paper and pencil for sketching and labeling dimensions
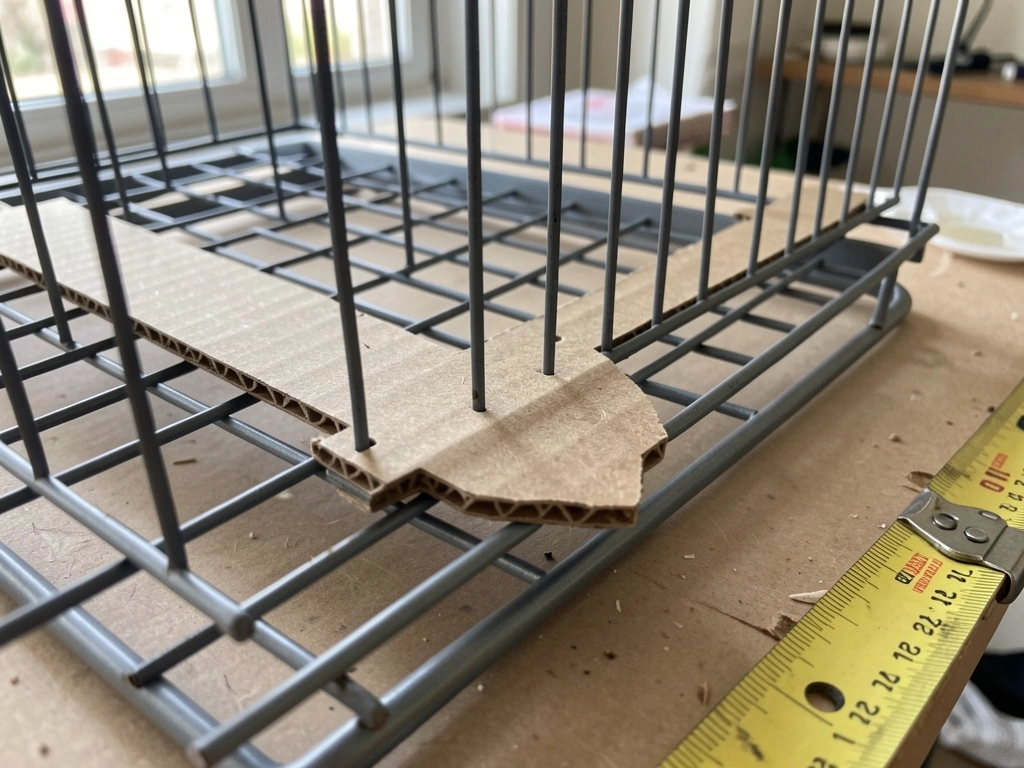
- A piece of cardboard for making a test template before cutting your final material
Step-by-step build instructions
These steps cover both ABS plastic and stainless steel. Where the process differs, I've noted which applies. Follow the cardboard template step no matter what material you're using — it will save you a wasted sheet of material.
- Cut a cardboard template to your base dimensions (width minus 1/8", depth minus 1/8"). Slide it into the cage to confirm it fits smoothly and clears the rails or frame on all sides. Trim if needed, then transfer those final dimensions to your material.
- Mark your cut lines on the ABS sheet or steel sheet using a permanent marker or scribe. For a single-piece bent tray, add the lip height to each edge of the base. For example, if your base is 14" x 12" with a 1.5" lip, your flat sheet before bending should be 17" x 15" (14 + 1.5 + 1.5 by 12 + 1.5 + 1.5). Mark corner notches (1.5" x 1.5" squares) at all four corners — these get cut away so the lips can fold up cleanly.
- Cut out the corner notches first, then cut the full sheet to size. For ABS, score with a utility knife along a metal straightedge and snap, or use a jigsaw. For stainless, use aviation snips. Cut slowly at corners to keep lines straight.
- Deburr and smooth every cut edge immediately. For ABS, run 220-grit sandpaper along each edge until no sharp points remain. For stainless steel, use a metal file first, then wet/dry sandpaper. This step is non-negotiable — sharp edges can injure your bird's feet and your own hands.
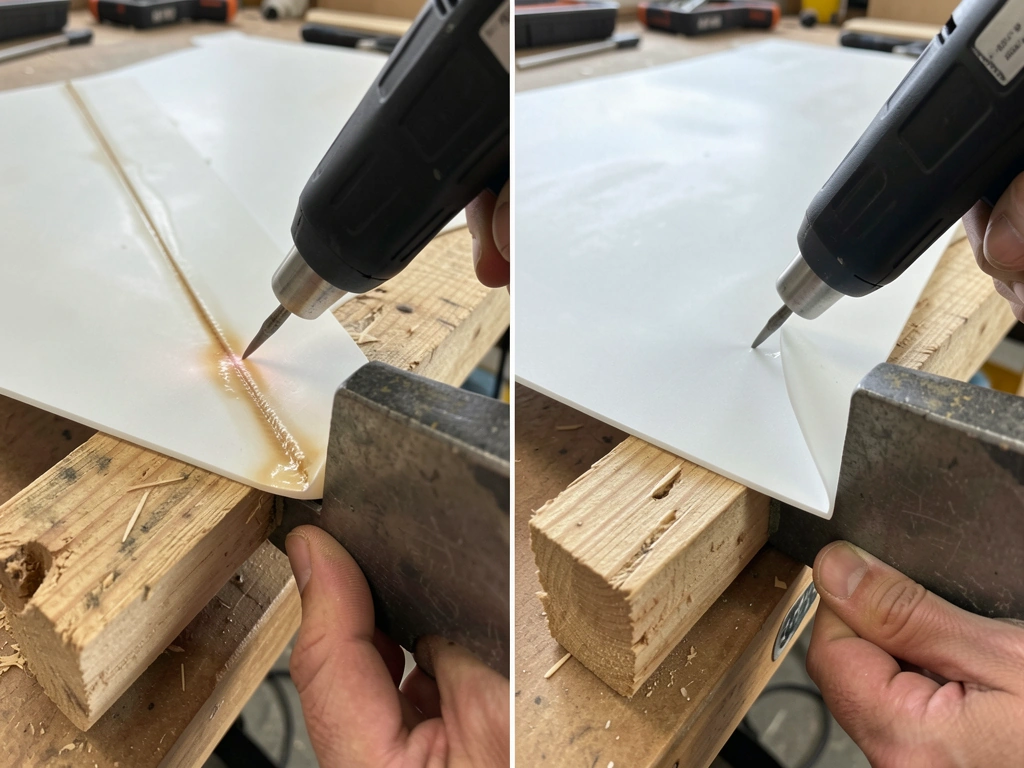
- Bend the lips up. For ABS: use your heat gun to warm a 2-3 inch band along each fold line until the plastic becomes pliable (about 30-45 seconds of direct heat). Clamp it between two straight boards and fold the lip to 90 degrees, holding it until the plastic cools and holds its shape (about 60 seconds). Repeat for all four sides. For stainless: clamp the sheet in a bench vise along the fold line and bend the lip up by hand or with a rubber mallet. A metal brake makes this cleaner if you have access to one.
- Secure the corners. For a single-piece bent tray, the corners will have small open gaps after folding. For ABS, fill and bond these with ABS cement or a plastic-compatible adhesive. For stainless, either rivet the corners or apply a small bead of food-safe silicone sealant on the inside corner only. Let cure fully before use.
- Do a final fit test by sliding the tray into the cage. It should slide in and out smoothly with no binding and no visible gaps larger than about 1/8" on any side. If it's tight, sand or file the edges lightly. If a gap is too large, a thin weather-strip gasket (foam tape, bird-safe and non-toxic) along the rails can take up the slack.
Edge finishing, fit, and preventing leaks or droppings spill
A tray that drips or lets droppings fall through the sides defeats the whole purpose. Here's how to close those failure points.
Sealing the corners
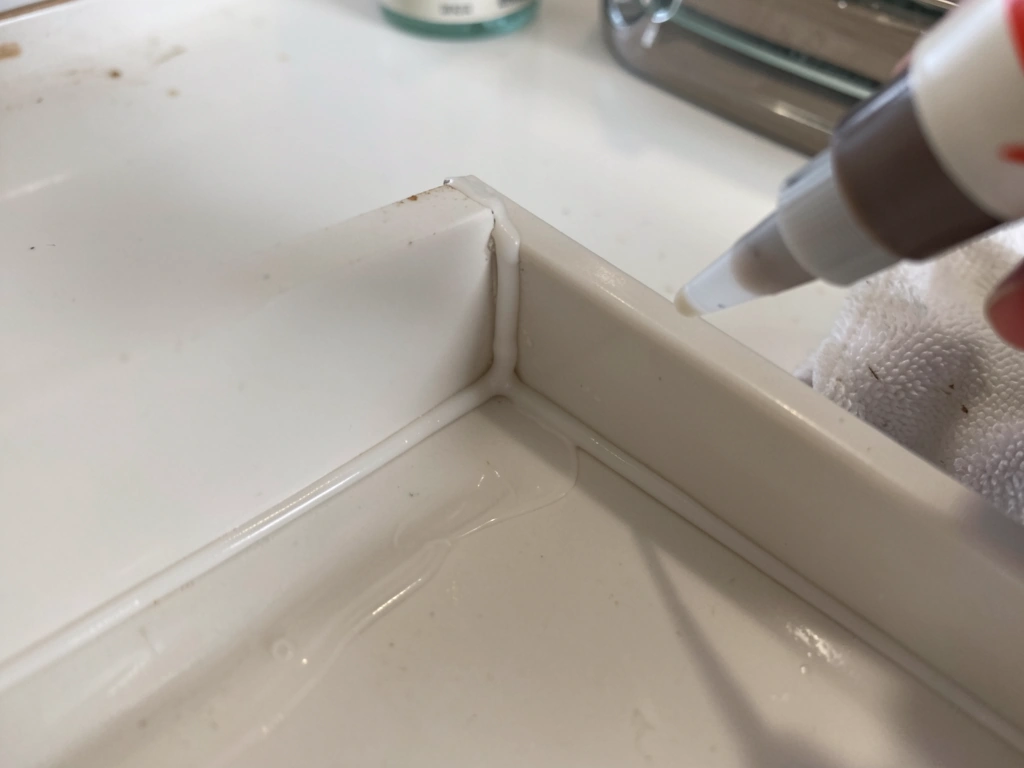
Even if your corner bonds look solid, run a thin bead of food-safe, bird-safe silicone (100% silicone, no antifungal additives) along the inside of every corner joint. These additives, sometimes labeled as mildew-resistant, can be toxic to birds. Plain 100% silicone is safe once fully cured (usually 24 hours). Wipe away any excess with a damp cloth before it sets, and let it cure completely with the cage unoccupied.
Checking the rail fit
Slide the tray in and push it to the back of the cage. Look at the gap on the left and right sides and at the back. Ideally the tray sits snugly with gaps under 1/8 inch. If there's a larger gap on one side, check whether the cage frame is square. Many older or DIY cages aren't, and you may need to trim one edge of the tray slightly to compensate. A small strip of closed-cell foam tape along the tray's outer edges can also act as a seal and reduce rattling.
Preventing the tray from sliding out accidentally
For pull-out trays, a simple stop block solves the problem of the tray sliding out when bumped. Glue or screw a small tab or bump stop on the underside of the tray near the back edge, sized so it catches on the cage rail when fully inserted. A small bead of ABS cement built up on the edge works for plastic trays. For steel trays, a small bent tab folded outward at the back does the job.
Cleaning, lining, and maintenance tips
The whole point of building this tray well is making cleaning easy. Here's how to set it up and keep it working.
Lining the tray
Line the bottom of the tray before putting it back in the cage. The easiest and most practical liner is plain, unscented newspaper or unbleached paper towels cut to fit the tray's base. Pre-cut a stack of 7 to 10 liners at once and keep them beside the cage. When it's time to clean, you pull out the tray, peel off the top liner, drop it in the trash, and slide the tray back. The whole process takes about 30 seconds.
Avoid cedar shavings, pine shavings, corncob bedding, and walnut shell litter. These can harbor bacteria, cause respiratory irritation, or (in the case of cedar and pine) release aromatic oils that are harmful to birds. Plain paper is boring but it's the safest and cheapest option. If you want something with more absorbency, unbleached paper cage liners sold specifically for birds work well too.
Daily and weekly cleaning routine
- Daily: pull out the tray, remove and replace the liner, check the tray surface for any droppings that went under the liner or stuck to the sides
- Weekly: remove the tray completely, wash it with hot water and a small amount of dish soap or a bird-safe cage cleaner, rinse thoroughly, dry completely before relining and replacing
- Monthly: inspect all corner seals and the tray edges for cracks, chips, or areas where the sealant is lifting; reseal as needed before bacteria can get into those gaps
When to replace or remake the tray
ABS plastic trays will last for years if cleaned regularly, but they do eventually crack, warp, or develop staining that can't be cleaned out. If you see visible cracks (especially in the corners or along bent edges), it's time to make a new one. With your measurements and materials already figured out from the first build, the second tray takes maybe half the time. Stainless steel trays essentially last indefinitely if they're 304 grade and you avoid abrasive cleaners that scratch the surface and make it harder to clean over time.
If you're at the stage of building or replacing just the tray, you may also want to look at the broader cage structure. Related projects like building a full DIY bird cage or converting a cabinet or armoire into a bird cage use the same principles for measuring, material selection, and safe finishing that you've just applied here. The tray is the most-cleaned part of any cage, so getting it right is a great first project before tackling the bigger build.
FAQ
How often should I clean the tray and the liner?
Use a removable liner, then clean the liner more often than the tray itself. For paper liners, swap the top layer daily (or sooner if wet). If you need to sanitize the tray, use hot water and mild soap, then dry fully before re-lining, avoid bleach-heavy mixes, since residue can irritate sensitive birds.
What if droppings still slip out the sides after I build it?
A common approach is to build the tray so droppings land on paper, then keep the paper edges inside the lip. If you still see gaps, add a thin closed-cell foam tape strip to the tray exterior edges (not inside the liner area where it can trap waste), and re-check side-to-side clearance for binding.
My pull-out tray binds or won’t slide smoothly, what should I adjust?
If it binds when sliding, first confirm you kept the 1/8 inch clearance on width and depth. Then relieve only one contacting edge at a time, test-fit, and stop as soon as it glides smoothly. For pull-out systems, also check that the cage rails are level, a slightly twisted rail can make an otherwise correct tray jam.
How do I prevent silicone from trapping waste in the corners?
For corner joints, make sure the bead of silicone is applied on the inside seam only, and wipe off any squeeze-out before it cures. After curing (about 24 hours), run your fingertip along the inside corners, rough ridges can trap waste and create hard-to-clean spots.
What cleaning products are safest to use on the tray?
Don’t use ammonia cleaners, fragranced products, or cedar-based or essential-oil scent additives, even if they seem “natural.” Also avoid coated sealers unless you know they are fully cured and bird-safe for ingestion exposure. When in doubt, switch to mild dish soap, rinse thoroughly, and let it dry completely.
How can I reduce odor without using risky chemicals?
Liners catch most mess, but you should still keep the tray dry underneath. Replace liners immediately when saturated. For odor control, increasing liner frequency and ensuring thorough drying after each cleaning usually works better than adding deodorizing chemicals.
How do I choose the right lip height for my specific cage?
Start with the grate-to-bottom-rail gap measurement. Your lip height must be less than that clearance so the tray can fully insert and sit flat. If you already built a tray with too-tall lips, trimming and re-finishing is safer than forcing it, because forcing can warp ABS or scratch stainless and prevent good closure.
Can I replace my existing tray with one made from a different material?
Yes, but treat it as a new build for fit and sanitation. If you switch materials, the thickness and finishing behavior change (ABS can bend when heated, stainless needs deburring, wood needs full sealing). Re-measure rail clearance and the grate gap, then remake the template because the old tray dimensions might not tolerate material differences.
What should I do if my bird’s droppings are wet and the tray area gets messy?
Watery droppings usually mean either diet or hydration issues, but from a tray standpoint, increase the liner coverage and ensure the paper liner sits flat without folds. If the tray is dry but you see wet leakage, inspect for side gaps, then add foam tape and confirm the tray sits square in the cage.
How can I tell when it’s time to rebuild or replace the tray?
If you see cracking, warping, or persistent staining you cannot remove, replace it. Also replace if the tray edges are sharp after cutting or if the corners have gaps that won’t seal with a new silicone bead. Stainless trays can last longer, but scratches that become hard to clean are a sign to retire or rework them.
Next Article
How to Make a Bird Cage at Home With Wire DIY Steps
Learn how to make a simple bird cage from wire with step-by-step instructions, safe materials, door, perches, and prep.